
BUYING GUIDE
How to Install Hair Extensions: A Method-by-Method Guide
Learn how to install hair extensions by method, compare home and salon options, and check preparation, products and aftercare.
Introduction
To install hair extensions, first identify the attachment system, assess the natural hair, match the product and prepare the attachment area. Then follow the instructions for that exact system. Clip-ins are designed for temporary home application; tape-ins, bonded tips and beaded or sewn wefts require professional fitting, maintenance and removal.
The differences matter before you buy. A perforated Butterfly Weft band is not an adhesive tape strip, and an individual nano tip needs different tools from a keratin bond. Ordering the wrong attachment can leave a salon with hair it cannot use for its planned service.
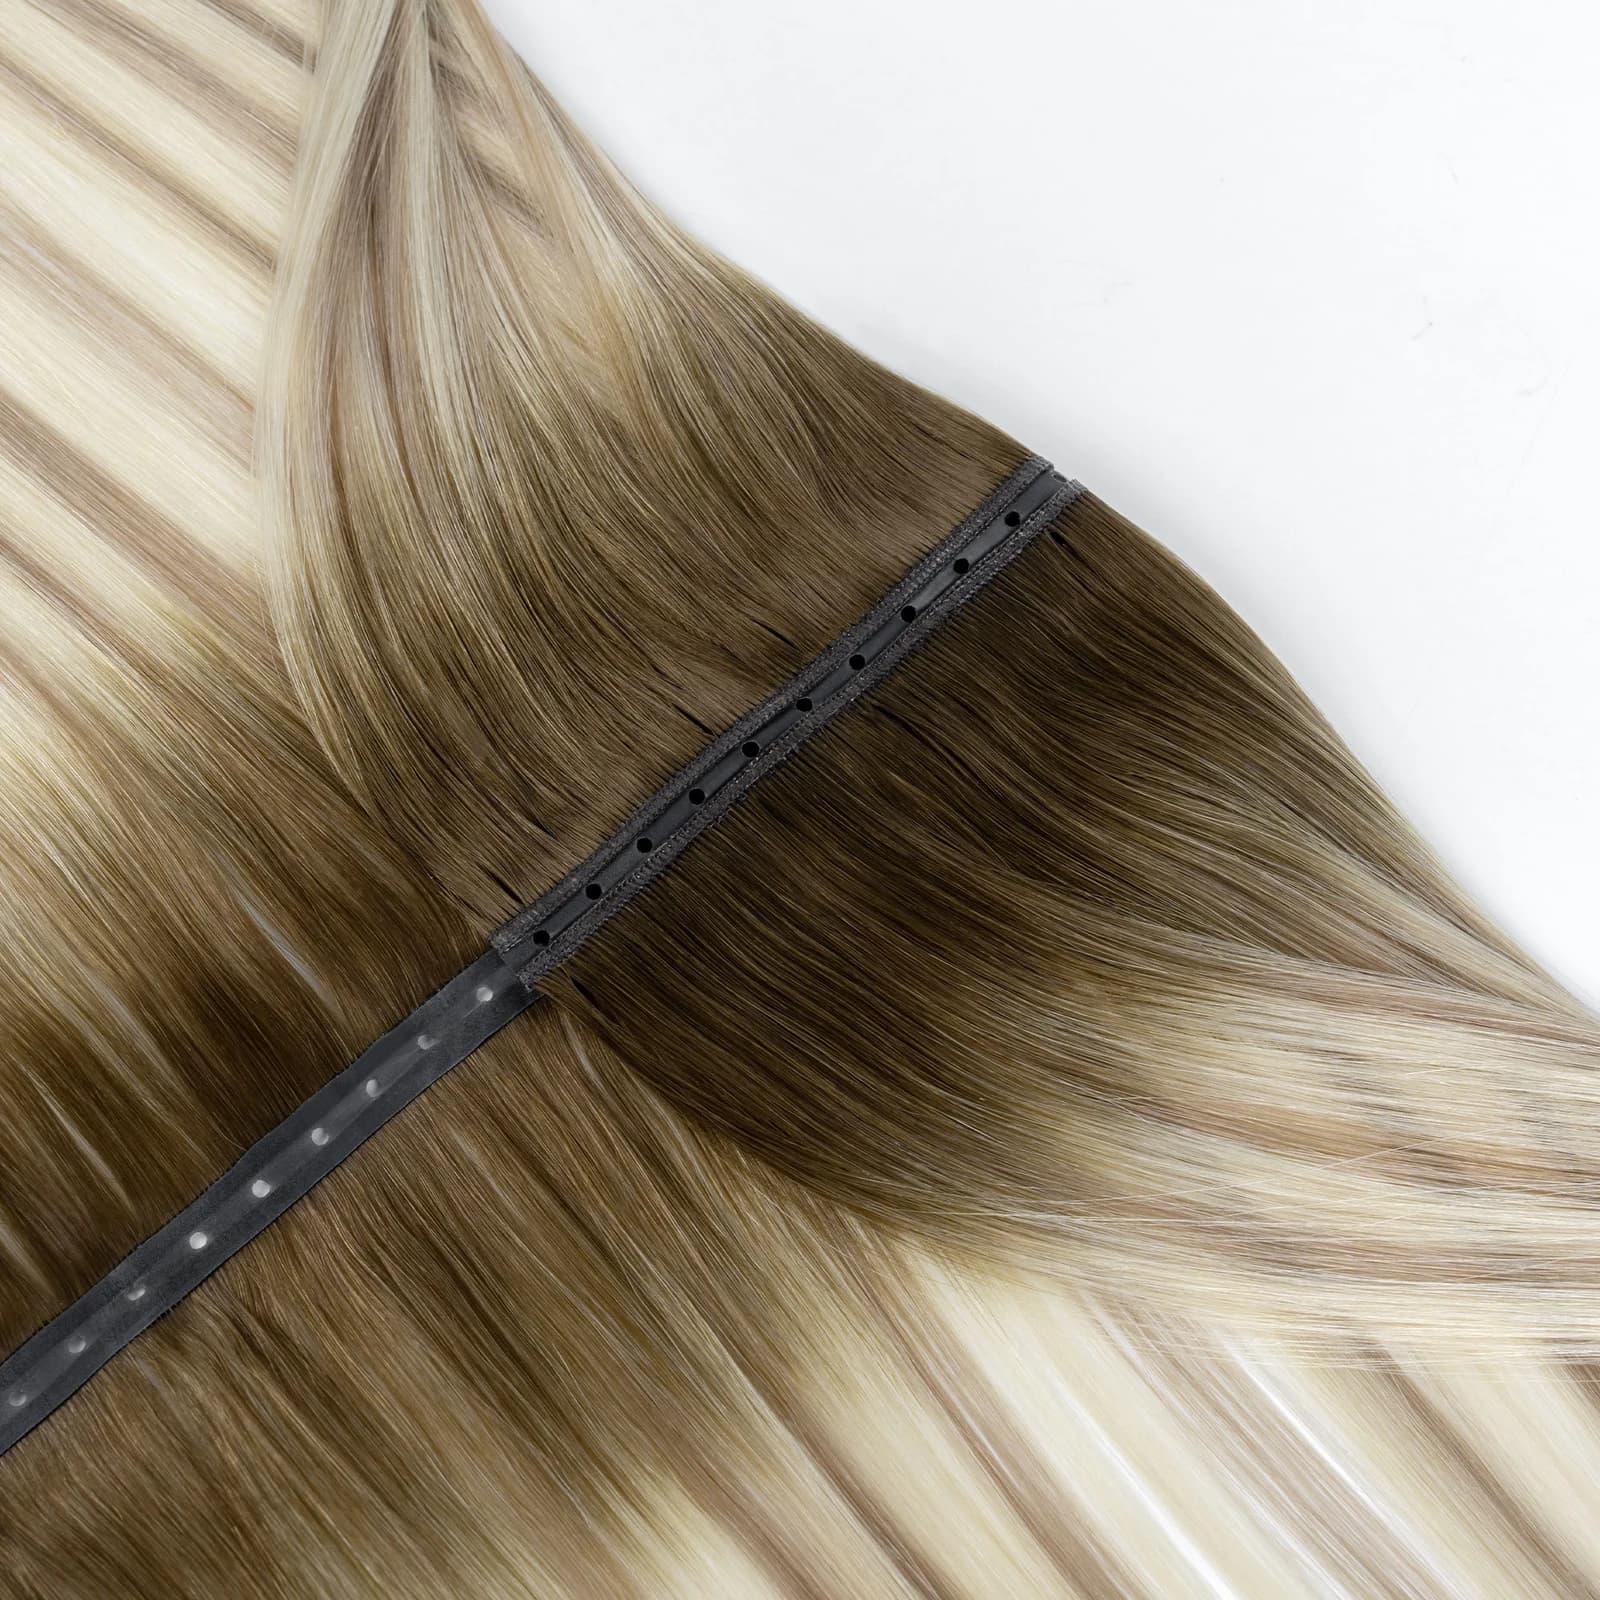
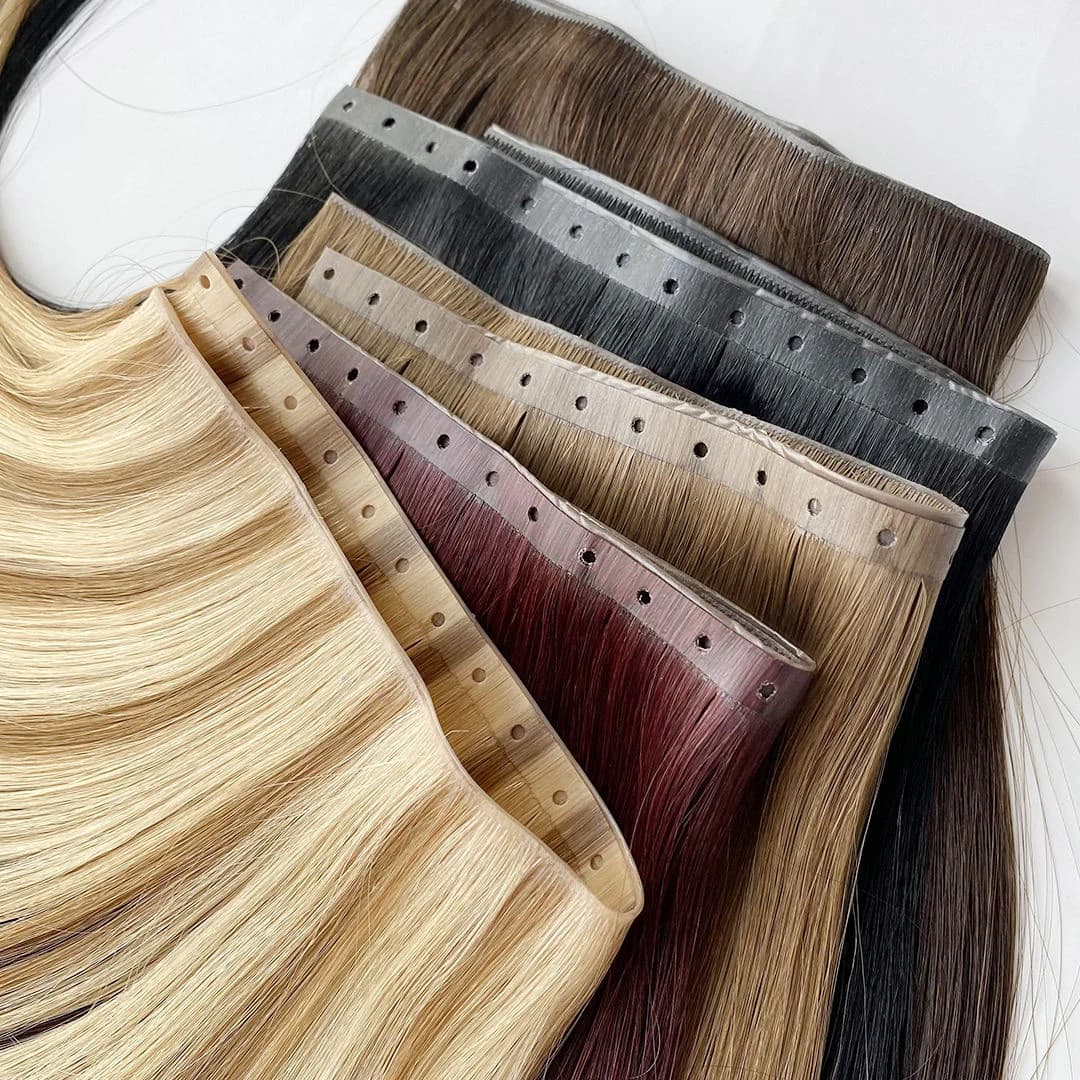
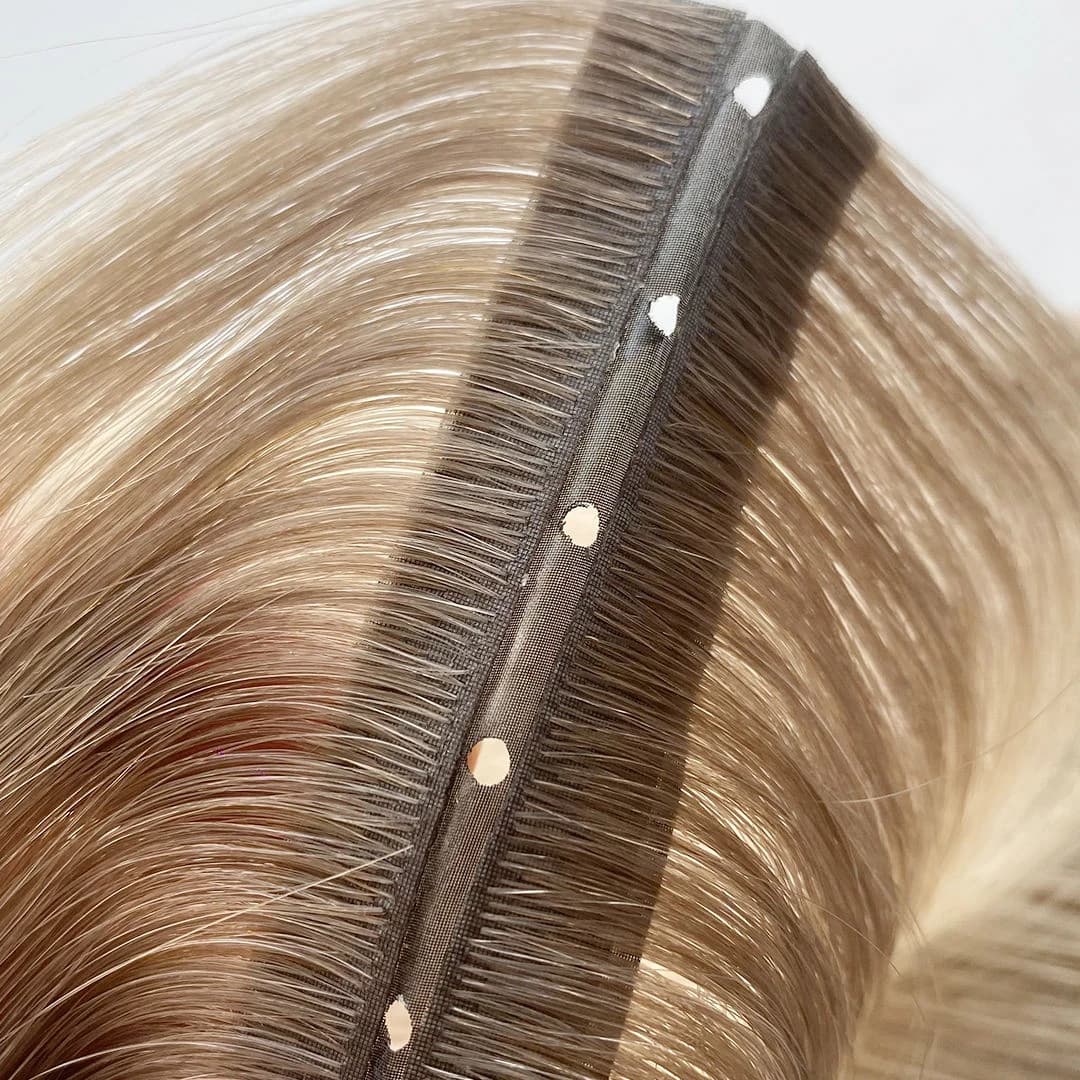
This guide explains the practical sequence, product choices and installation preparation for each main method. The photographs show supplied Butterfly Weft products before fitting. Professional method summaries help you understand the service and purchasing requirements; obtain training and product-specific instructions before performing those services.
Choose the installation method before buying the hair
Start with how long the wearer wants the result, how much coverage is available and whether regular salon visits are realistic. A thin attachment alone does not establish suitability for fine or sparse hair.
| Method | How it attaches | Intended application | Main buying check |
|---|---|---|---|
| Clip-in | Clips fixed to removable pieces | Temporary home wear | Piece widths, clip layout and set weight |
| Tape-in | Adhesive tabs around selected hair sections | Professional fitting | Tab dimensions, tape compatibility and removal guidance |
| Sewn or beaded weft | Weft secured to a planned foundation | Professional fitting | Weft width, piece weight and foundation method |
| Butterfly Weft | Perforated band for a specified bead or micro-ring system | Professional fitting | Hole construction and compatible attachment instructions |
| Nano ring | Individual tips held with compatible small rings | Professional fitting | Tip-to-ring compatibility and strand specification |
| Keratin tip | Individual pre-bonded strands | Professional fitting | Bond type, application system and removal method |
For occasional event volume, begin by evaluating Clip-in Hair. For continuing salon wear, compare maintenance, removal and product suitability together. A salon should offer methods its team is trained to install and support.
Match the method to the application scenario
For a wedding or occasional photographs, a removable set allows a trial of the exact hairstyle before the event. Check it with the planned updo and accessories, because coverage changes when hair is lifted.
For daily salon wear, compare the full service: hair, installation, blending, maintenance and removal. Someone unable to attend the required appointments may need a different option even when the initial result looks suitable.
For a salon introducing Butterfly Weft, approve one compatible sample configuration and obtain fitting guidance before stocking multiple shades. A product photograph cannot confirm how the completed attachment will behave on different clients. These are planning scenarios, not reports of completed customer installations.
Installation preparation: what to check first
Assess supporting hair and the intended result
Record natural length, strand thickness, density, breakage, chemical history and usual hairstyles. Check the proposed attachment areas, including the sides and perimeter. Fine strands with dense coverage present a different situation from sparse hair with visible scalp.
Discuss exercise, swimming, styling and appointment availability. If there is unexplained shedding or an irritated scalp, pause the service and seek appropriate professional advice. Extensions provide cosmetic length or fullness; they do not treat hair loss.
Match the hair and confirm the quantity
Compare the extension against the visible mid-lengths and ends, then check the root shade and attachment color. Use a physical sample in daylight and normal indoor lighting. Consider texture after washing and drying, not only the supplier's styled photograph.
Ask the stylist to determine installed weight and placement before ordering. Pack weight, piece count and width describe the purchased product; none is a universal fitting prescription. Our hair extension quantity guide explains those units.
Prepare the attachment area and tools
Follow the selected system's cleansing and drying instructions. Tape application needs particular attention to residues that interfere with adhesion. Do not transfer a clip-in grip technique, such as a styling product at the roots, to an adhesive method.
Prepare clean sectioning clips, a tail comb, a suitable extension brush and the method's specified tools. Professionals also need compatible attachments, removal supplies and a placement plan. Organize pieces by width or intended row before starting so product application follows the consultation.
How to install clip-in hair extensions at home
Clip-ins are the practical starting point for temporary self-application. Read the instructions for the set, check that each clip opens and closes, and detangle the pieces before attaching them.
- Create a horizontal part in the lower back area and secure the hair above it. Leave enough natural hair around the perimeter to conceal the base.
- Select a piece that fits the section without reaching too close to either edge. Open its clips and position the base against healthy supporting hair.
- Secure the center clip first when the piece has one, followed by the side clips. Keep the base flat and check for pulling before continuing.
- Release another layer of natural hair and repeat with suitable pieces. Use narrower pieces where space is limited and leave sufficient covering hair above.
- Let the natural hair down, blend gently and inspect the back and sides. Turn the head and check the hairstyle in normal movement; remove or reposition any uncomfortable piece.
Perfect Locks' clip-in guide illustrates sectioning, center-first clipping and blending. Adapt the layout to the actual set and available coverage rather than copying another brand's piece count.
Remove clip-ins before sleeping. Open every clip fully and support the hair while releasing the piece. If clips repeatedly slide or show through, reassess the layout, weight and suitability instead of adding more tension.
How tape-in hair extensions are installed
A stylist prepares clean, dry hair, maps concealed attachment areas and takes controlled sections. In a conventional two-tab system, the natural hair sits between aligned adhesive tabs. The stylist checks the seal and free movement, then continues through the planned placement and blends the result.
Section size matters: the hair must support the attachment while allowing the intended adhesive contact. Luxy Hair's tape-in instructions illustrate preparation, tab alignment, sealing and movement checks for its own product. Its tab width and placement measurements are not specifications for DR hair.
DR's standard Tape-in Hair pack contains 100g across 40 individual tabs, with 4 × 0.8cm attachments. Forty tabs can form 20 conventional two-tab pairs; that arithmetic does not determine how many pairs a client needs. Confirm the adhesive, tools, first-wash instructions and professional removal process with the sample.
Do not improvise with household glue or pull apart a slipping attachment. Ask the installer to assess the cause and use the compatible removal system before refitting.
How professional weft and Butterfly Weft installation differ
Sewn or beaded weft: plan the foundation first
The stylist maps rows around density, coverage and the desired result. Depending on the chosen system, a weft is secured to a prepared braid or beaded foundation. The professional checks that the foundation supports the selected hair without excessive tension, fits the weft using the system's technique, then checks movement and blends.
DR Genius Weft supports professional beaded or sew-in application. Standard 100g packs can contain 2, 4 or 5 wefts, so the piece count changes average piece weight. Confirm usable width for the selected format instead of assuming every piece has the same dimensions.
Ask about cutting before resizing. Cutting permissions vary by construction; instructions for one weft should not be applied to every sewn, bonded or hand-tied seam.
Butterfly Weft: use its attachment holes correctly
The photographed DR Butterfly Weft has a perforated band designed for professional micro-ring or bead fastening. The holes identify attachment positions within a system; they are not clip sockets or evidence of adhesive tape.
Superior Hair's Butterfly Weft explanation describes its own hole-and-bead construction. Suppliers can use different hole layouts, materials and fitting sequences. Obtain the instructions for the DR sample being evaluated rather than transferring another brand's bead count, spacing or fitting time.
A professional workflow should address these points in order:
- Confirm the band's dimensions, permitted alterations, compatible attachments and removal instructions.
- Map placement against healthy supporting hair and leave adequate perimeter coverage.
- Prepare clean sections according to the selected system, keeping unrelated hairs out of each attachment.
- Fit the weft using the specified bead or micro-ring technique and compatible tools.
- Check support, band movement and comfort throughout the row before adding further hair.
- Release covering hair, inspect normal movement, blend professionally and record the fitting plan for maintenance.
DR's standard pack is 100g across two 40cm-wide pieces, averaging approximately 50g each. The full pack is a purchasing unit. A trained stylist must decide how much to install and whether the configuration suits the client. Confirm cutting guidance before altering the band, or discuss a custom width.
How nano ring and keratin tip installations work
Nano rings use compatible mechanical attachments
With Nano Ring Hair, individual extension tips are secured with compatible rings around selected natural-hair sections. The installer chooses placement, supporting sections and suitable rings, then closes each attachment with the specified tool and checks movement.
Tip dimensions, ring openings and linings must work together. A small-looking attachment can still create poor load distribution when incorrectly fitted. Order a compatible sample combination and confirm the opening and removal method before a salon service.
Keratin tips use a different application system
Keratin Tip Hair is applied strand by strand with an appropriate professional bonding system. The stylist controls section size, bond formation and placement, then checks separation and blending. It is different from mechanically clamping an unbonded individual tip.
Great Lengths' keratin-bond guidance describes thermal and ultrasonic application within its own trained professional system. Those settings do not establish the correct temperature or process for another supplier's bond. Request DR sample-specific application and removal guidance; avoid universal heat-setting advice.
After installation: inspection, care and troubleshooting
Before leaving the salon, check the result with the hair down and in the normal styles agreed at consultation. Ask for the installed product, placement record, care instructions, removal plan and next review date. Photograph the result with permission for later comparison.
| Observation | What needs checking | Appropriate next step |
|---|---|---|
| Attachment shows through | Coverage, placement, shade and bulk | Have the layout reassessed |
| Repeated slipping | Preparation, attachment compatibility and supporting section | Ask the installer to inspect before refitting |
| Root tangling | Care routine, shed-hair accumulation and maintenance timing | Arrange professional detangling and inspection |
| Pulling, pain or scalp irritation | Tension and suitability | Stop tolerating the discomfort and seek prompt assessment |
The American Academy of Dermatology identifies tight extensions and weaves as possible traction risks. Pain, stinging and scalp changes need attention. Unexplained or progressive hair loss warrants medical assessment; do not tighten attachments to compensate for reduced density.
Follow the selected system's washing, drying, brushing and styling guidance. Keep direct hot-tool contact away from attachment materials. Ask which products are compatible and when washing can resume. Set maintenance according to the system, hair growth and condition rather than treating one advertised interval as universal.
What salons should test before ordering installation stock
Start with a sample and written customer requirements. Record hair option, shade, length, texture, grams, piece count, width and attachment compatibility. Check the sample before modification, then document an agreed wash-and-dry evaluation and supervised application where appropriate.
DR's documented salon sourcing example began with a physical color ring and 300g across Genius Weft, tape-in and flat-tip formats. The stylist evaluated installation, washing, styling and client comfort before increasing orders. That experience supports sample-led purchasing; it is not a measured trial of the photographed Butterfly Weft.
Separate proposed factory testing from checks already confirmed. DR's quality-control process includes production-stage checks, individual pack weighing and final pre-shipment sampling for weight, measured length, color under inspection lighting, shedding and smoothness. A sampled nonconformity triggers full re-inspection of the affected shipment. No numerical test threshold is claimed here.
For shipment inspection, compare labels, shade, pack layout and attachment condition with the approved sample. Retain records for reorders. DR Butterfly Weft hair orders start at 100g per color and length; paid samples use wholesale hair pricing, with shipping quoted separately. Confirm current availability and allow inspection time before scheduling installations.
Frequently asked questions
Can I install hair extensions myself?
Clip-ins are intended for temporary self-application when the set suits your hair. Arrange professional fitting for tape-ins, beaded or sewn wefts, Butterfly Weft, nano rings and keratin tips. Each requires method-specific placement, compatible tools and removal knowledge.
How much hair do I need for an installation?
Ask the stylist to assess density, coverage, current length and the intended result. Grams alone do not determine suitability. A 100g purchasing pack is not a recommendation to fit 100g on every client.
How long does installing hair extensions take?
It depends on the method, quantity, preparation, blending and installer. Request an appointment estimate that includes those stages. A supplier's short demonstration time should not be treated as a complete salon booking duration.
Are Butterfly Wefts installed with tape?
The DR product shown here is designed for professional bead or micro-ring fastening through a perforated band. It is not installed as a tape-in tab. Confirm the product and instructions because supplier names can differ.
Can hair extensions be fitted on very short or thin hair?
Suitability depends on supporting hair and coverage in the planned attachment areas. There is no universal minimum length or safe installed weight across all systems. Seek a consultation before purchasing; sparse, fragile or actively shedding hair needs particular care.
Can the same extensions be reinstalled?
Some systems allow reapplication after professional removal, but hair and attachments need inspection first. Tape requires suitable replacement tape; other attachments have their own replacement rules. Ask about reuse for the selected product rather than assuming a fixed number of services.
Conclusion
Knowing how to install hair extensions starts with choosing the correct attachment and preparing for that method. Use clip-ins for suitable temporary home wear, and plan professional services around training, support, coverage and maintenance. For salons and buyers, approve the complete product specification and a sample before scaling an order. A successful purchase should support both the initial installation and the care and removal that follow.
HAIR EXTENSION SOURCING
Request a hair extension specification or quote.
Share your shade references, lengths, texture, quantities and preferred pack format. Fields marked with * are required.